
Photo Source
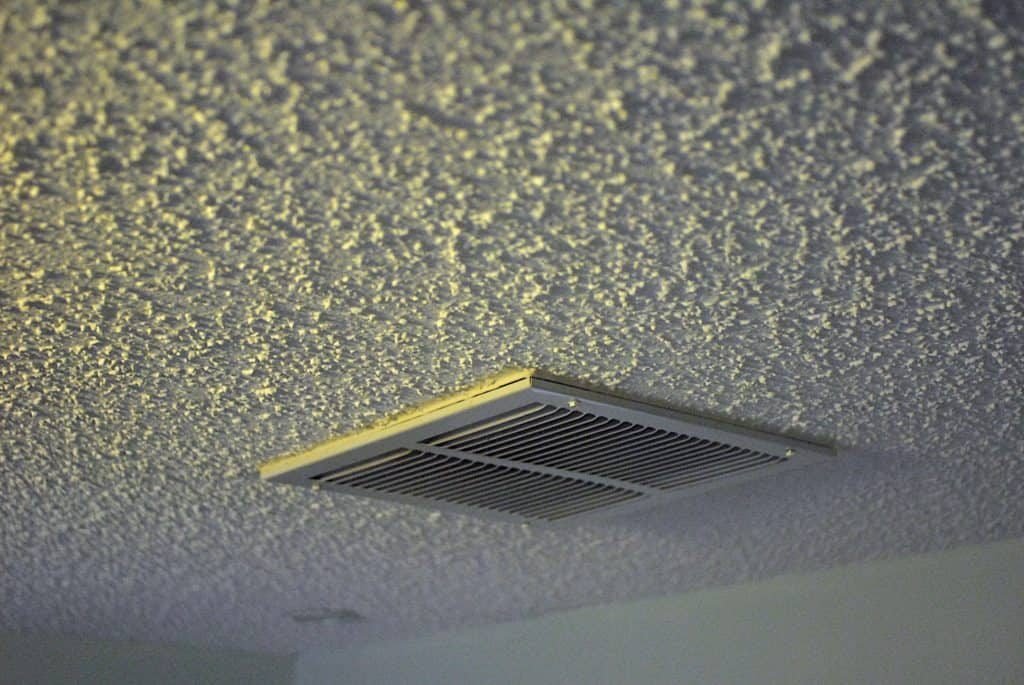
We recently shared a post on 3 options for getting rid of popcorn ceilings. There are a few different ways to approach it, including hiring a professional (like Mike’s Guys) or installing beadboard sheets over the popcorn for a cleaner look. Of course, if you have settled on the idea of tackling the project on your own, we thought it would be helpful to have a step-by-step guide explaining how to scrape and refinish your ceilings.
Before You Start…
As mentioned in our initial post, before you start scraping away, it’s important to test your ceiling for asbestos. Homes built prior to 1980 potentially contain this dangerous substance in the ceiling, which could be a hazard to your health if inhaled. You can easily scrape off a section and send the sample by mail to an asbestos testing lab for a small fee. If asbestos is present, it will be necessary to hire a company that specializes in removing materials containing the substance rather than trying to do it yourself!
Gather Your Supplies
If you’re clear of asbestos, you can proceed with preparing for your project. Gather the following items:
- Spray bottle or one-gallon pump sprayer (the pump sprayer will be much easier, especially for a large room).
- Drywall finishing knives: a 4-inch for small spaces and a 10-inch for the majority of the ceiling. OR a 12-inch ceiling scraper.
- Plenty of plastic sheeting and tape. It gets messy!
- Dustpan with duster.
- Several trash bags.
- Paper towels.
- Spackling putty and putty knife.
- Safety goggles and a dust mask.
- OPTIONAL: a vacuum sander and HEPA vacuum bags.

Photo Source
-
Step 1: Remove Vents, Fixtures, and Furniture
Remove any vent covers and light fixtures from the ceiling. While you can leave these items up, it’s easier to take them down than to work around them. You’ll likely need to remove them later if you intend to paint anyway, so might as well make it easier on yourself and get them out of the way ahead of time. Be sure to cover the wiring of the light fixtures to prevent getting them wet.
It’s also a good idea to move out as much furniture as you can from the room. You’ll be moving around the entire room with your step stool, and large pieces of furniture may get in the way. An empty room makes for both an easier process and quicker clean-up! Any items you can’t remove, be sure to cover with plastic sheeting.
-
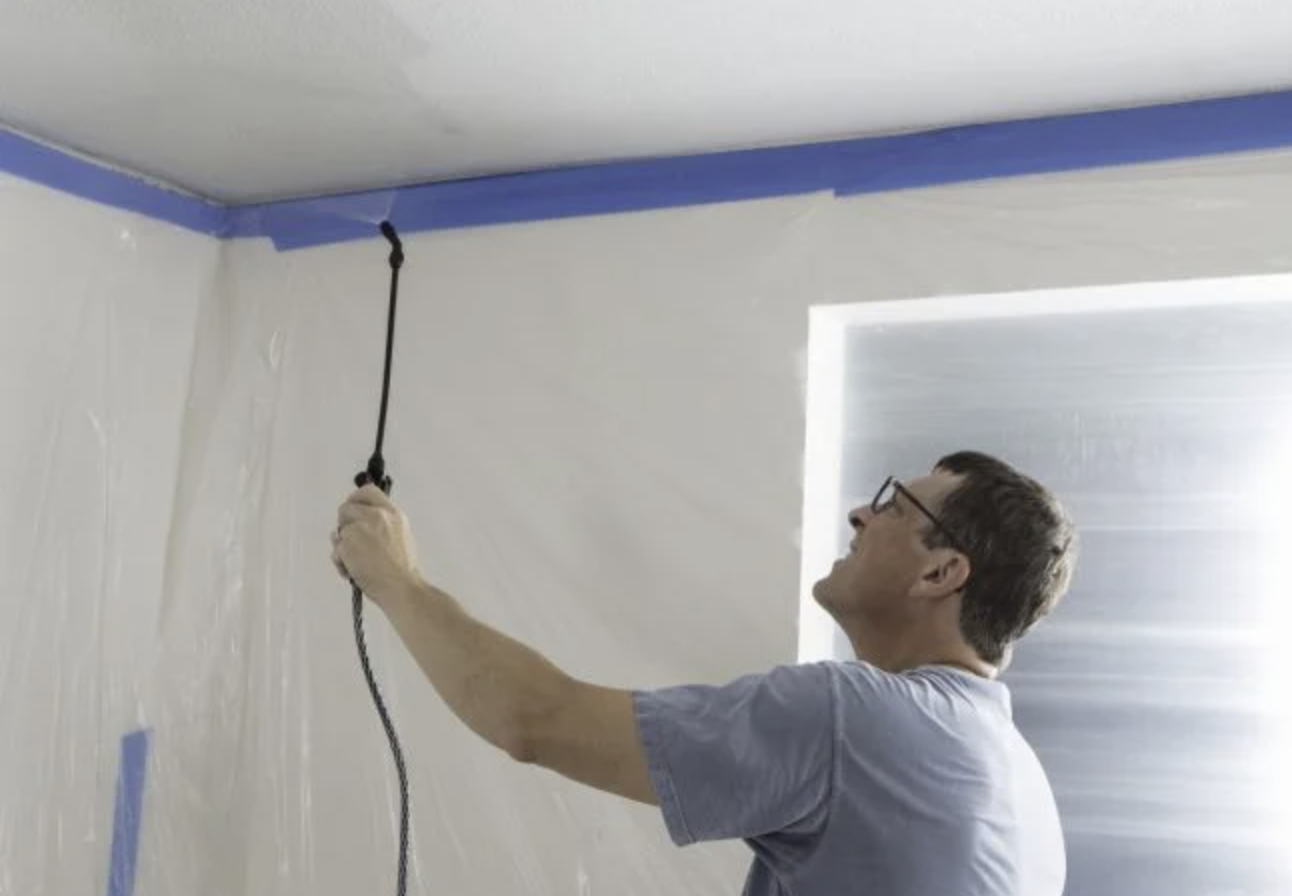
Cover the Floors
It may seem like a hassle, but covering the floors with plastic sheets will be a time-saver in the end! Scraping the ceiling creates a HUGE amount of dust and debris. Even if you have carpet you’re planning on replacing after the ceiling is done, having the sheets laid out will allow for a much faster clean-up. Be sure to tape down the edges to the baseboards hold the sheets in place and keep the floors from getting wet.

Photo Source
-
Wet the Ceiling
Before you spray the ceiling, you can try to scrape a small section of it dry. Dry scraping is an option, but it does tend to be more difficult and also creates more dust. However, the choice is yours if you find it easier!
For wet scraping, choose a corner you’d like to start in and spray a small section (3’x3’ or so) until it is saturated with water. Let it soak for at least 5-8 minutes.

Photo Source
-
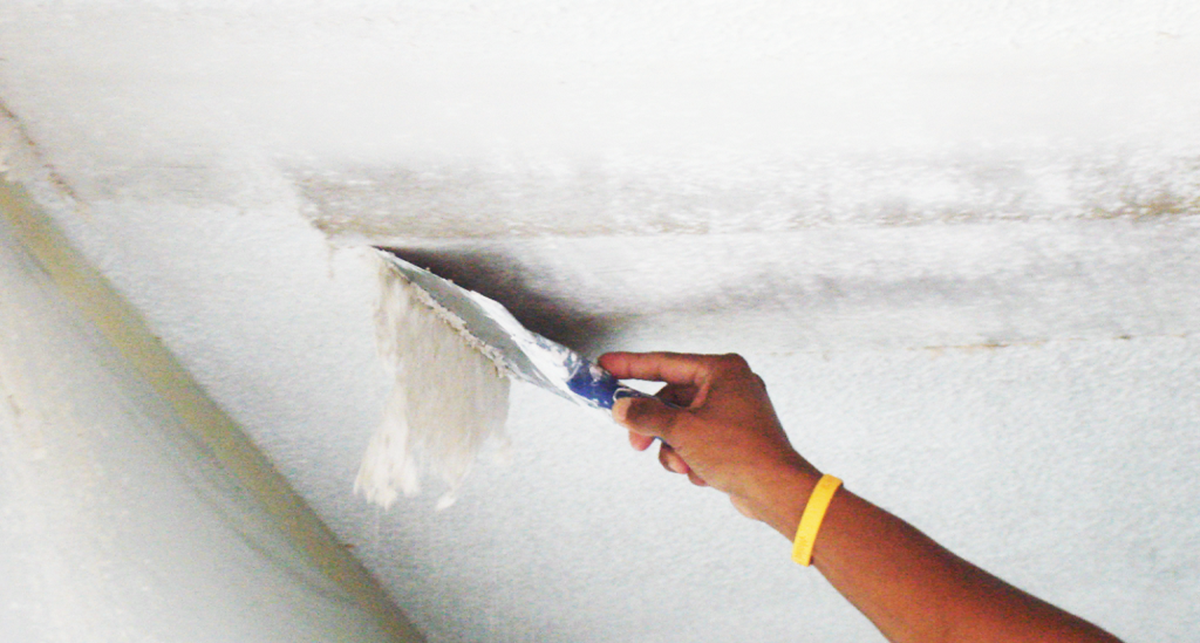
Scrape
After your 5-8 minutes is up, put on your goggles and dust mask – it’s about to get messy! Before you begin scraping, spray over the next section. That way, it can soak while you are scraping the first section. This will help save some time and make the process a little quicker.
To scrape, place the flat end of the scraper or finishing knife even with the surface of the ceiling and push away from you in a straight, even motion. Hold the dustpan directly underneath with your other hand to catch the debris. You’ll also want to have your trash bag near by so you can empty the tray frequently.
You may need to re-wet certain areas or let them soak a bit longer if they aren’t scraping smoothly.
Another important note – if you’re wiping up loose popcorn as you go, it’s best to use the paper towels and toss them. Using a rag and rinsing in the sink could easily cause a clogged drain. If you do plan to use a rag, shake it off over the trashcan and then rinse in the sink over a strainer!
-
Be Careful Around the Edges
When you get close the wall, stop scraping about 1-2 inches away and empty your dustpan. Hold the dustpan vertically against the wall, so the bottom of it is against the wall and the edge is against the ceiling. Proceed with scraping along the wall, not toward it. Doing this will protect the drywall tape against the wall, so you won’t need to fix it later on. This shouldn’t be an issue if you have crown moulding.
-
Clean up
Once the ceiling is completely scraped, go back over the room and wipe up any excess water on the walls or floor and pat yourself on the back for all that hard work! Unfortunately, you’re not done just yet.

Photo Source

-
Patch with Spackle
After the scraped ceilings are dry, you will see the original foundation of the ceiling – the drywall and the drywall mud. Painting directly on this surface wouldn’t look too great, as it would be full of lines, ridges, and unevenness – definitely not ideal!
You’ll first want to look over the ceiling for rough areas, craters, and holes. Use your putty knife to smooth spackle over these areas as evenly as possible. Make sure to fill the entire hole; even if it’s overfilled, it will be smoothed out when sanded.

Photo Source
-
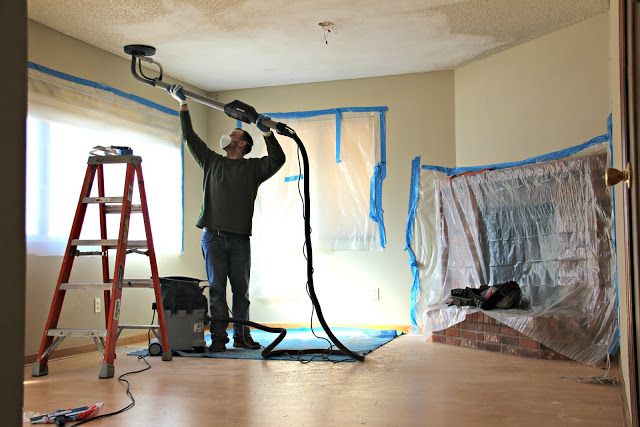
Sand Smooth
Once the spackle has dried, sand over those spots as well as the ridges of the mud lines to until you have a smooth surface. A medium-grit sand paper should do the trick. A vacuum sander is not required, but would be a huge help in reducing the amount of dust from sanding! You can purchase a vacuum sander for relatively cheap on Amazon; it attaches to your vacuum (shop vac) and sucks up dust from below your sander as you work. It’s a great time saver and keeps the dust to an absolute minimum! If you do choose to go this route, it’s worth noting that you should also purchase HEPA bags for your vacuum to contain the super-fine particles and keep your vacuum from getting clogged.
After sanding, go over the ceiling once over with a damp rag or sponge mop to remove any leftover dust.

Photo Source
-
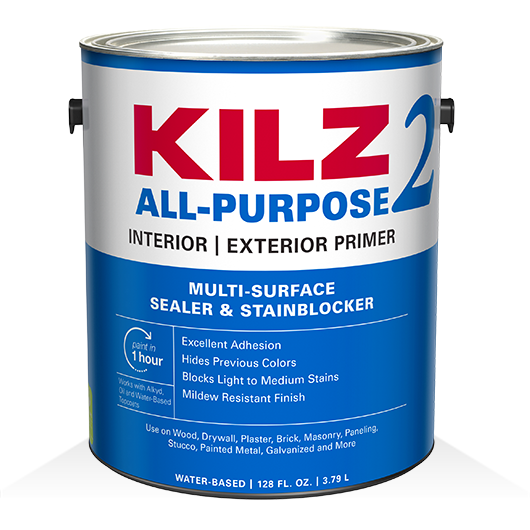
Prime
The next step is priming the smooth ceiling. Apply a strong primer, such as Kilz 2 Primer, evenly with a paint roller. It’s definitely helpful (though not required) to have a roller shield to prevent drips on yourself and the floor. Allow it to dry fully before moving to the next step.
-
Texture (Optional)
If you’re not satisfied with the surface of your ceiling once the primer has dried, it may be necessary to apply a texture to hide any remaining imperfections. There are many options available at home improvement stores or online; some ceiling paints even include paint and texture and don’t require additional painting afterward. Of course, if you worked hard to remove all that popcorn and a smooth ceiling is what you’re after, skip this step and move on to painting!
-
Paint
Decide what paint you’d like to use for your new ceiling. Most homeowners opt for a flat white. Paint evenly over your primed ceiling and allow to dry before applying the second coat.

Photo Source
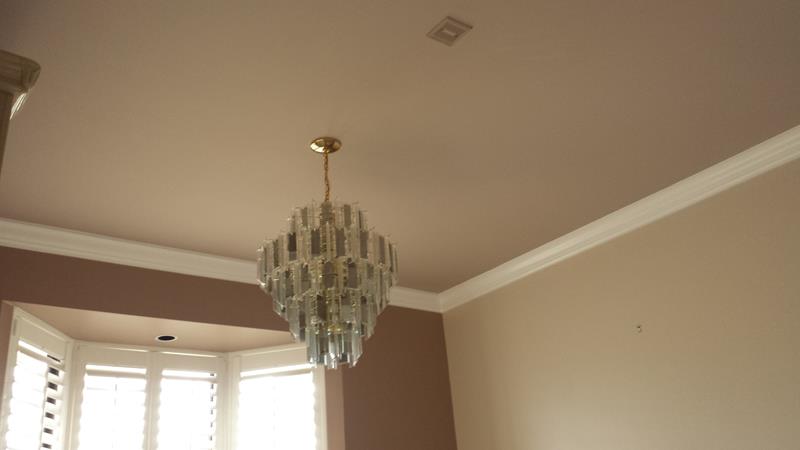
Once you’re completely satisfied with the coverage and the paint has fully dried, you’re ready to re-install your light fixtured and vents. Then you can sit back and enjoy your beautiful, popcorn-free ceiling!
We hope this DIY guide has been helpful. While it might sound like an easy task, removing popcorn texture and refinishing your ceiling is a tedious and physically challenging project. Be prepared to put in a lot of time and effort, and endure the massive clean-up that will be required.
If you have questions about the process, or instead prefer to have a professional do the work for you, our Small Projects Division would be glad to help you out. Contact Mike’s Guys for more information!
Warm Regards,
Mike’s Guys